


Stalls 15-16 Model Part 2 – Paint to Finished
Continuing on from our previous posting on the model of Stalls 15 and 16 in HO Scale, once the drywall compound “concrete” floor had set, it was painted to look more like concrete, and the walls could start being installed. Image 10 shows the cinder block wall of Stall 15 along with the doors of Stalls 13 and 14 installed, with the timber structure being worked on, and the rear walls being test fit while still not complete. Image 11 shows even the small details being worked on, the exterior door posts on the patio which hold the large doors open.
Matching the Roundhouses unique windows took some effort, with O and S scale windows being used throughout, and even then, to create the massive rear windows of the stalls, two windows had to be combined to create tall enough panels! Once the windows were sorted, they could be installed, but not before the timbers were stained to take away the bare stripwood look, and make them look like the impressive Douglas fir beams in the stalls. As can be seen in Image 12, the difference between stained and unstained strips is striking. Once the main timber beams were installed, the roof-walks along the centre high bay were installed. As a compromise, I decided to forgo a roof on the portion of the stalls occupied by the museum, but to install the roof walks in Stall 15 to give a sense of what the interior of the roundhouse is like (Image 13).
It is the little details that make any project, and for those who know where to look, little things like our lockers, kitchen, fridge and tool cabinet along the rear walls define the space and make it instantly recognizable to anyone who has been to the stalls, but also provide a talking point for anyone at a show who hasn’t been to the roundhouse (Image 14). Our moveable pallets were replicated using commercially available pallets, with styrene structures, and 3D printed lockers. Other little interior details will eventually follow, including our forklift, and hopefully someday, a 3D printed model of our Elwell-Parker crane.
The final two Images 15 & 16 show the more or less finished model with some of the HO scale models of TRM equipment in the stalls. There is still some work to do on adding details, and as with any project, there is the constant ability to keep on going by adding details or more to the model, and for the foreseeable future these small projects will continue. More pictures of the completed model along with the TRM’s booth at the Ottawa Train Expo will follow.
-Afterword-
For those interested, aside from the 3D printed materials from Shapeways; an Ikea Shelf; t-Gauge track from KK Eishindo of Japan; and, drywall compound, everything else used can be acquired through local hobby shops or craft stores. Supplies from Evergreen Scale Models; Plastruct; Hunterline/Mount Albert Scale Lumber; Peco; ScaleStructures; Micro Engineering; Trueline Trains Paints; and, Floquil Paints were used for the model of the stalls.
Click here to read the first posting in this series.
Posting and photos by Stephen Gardiner
Click on each image for a closer look!
 |
| #10 - Concrete Floors and Roughed In Windows |
 |
| #11 - Completed Patio |
 |
| #12 - Stained Timber and Windows |
 |
| #13 - Roofwalks in PLace |
 |
| #14 - Rear Wall Details |
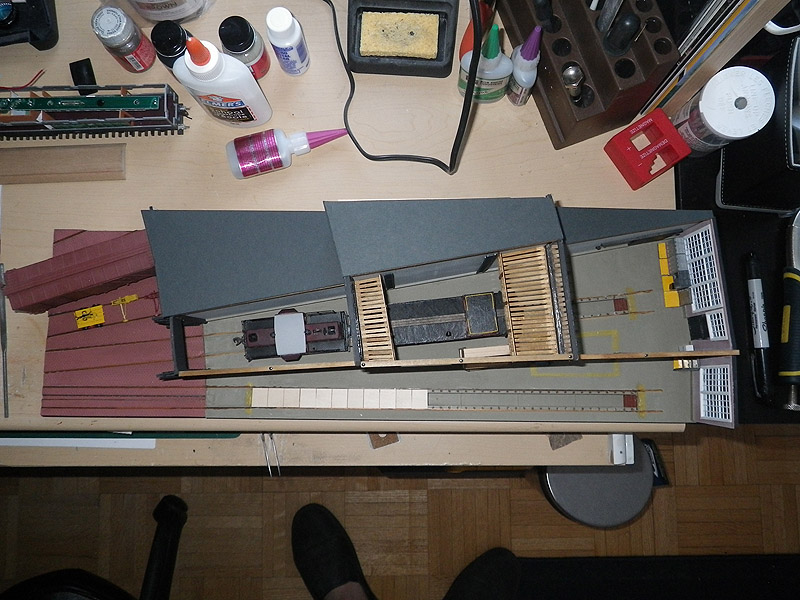 |
| #15 - Overhead View |
 |
| #16 - Side View |
<< Home